HOW TO change supercharged '02-04 spark plugs
Okay, so you want to change your spark plugs on your supercharged '02-'04 Xterra? Well I have composed a HOW-TO that I hope is worthy of your time. Read through it and study the pics before starting your project. The pics show alot of detail and were taken with the intent of writing this how-to and helping you at this moment. Good luck.
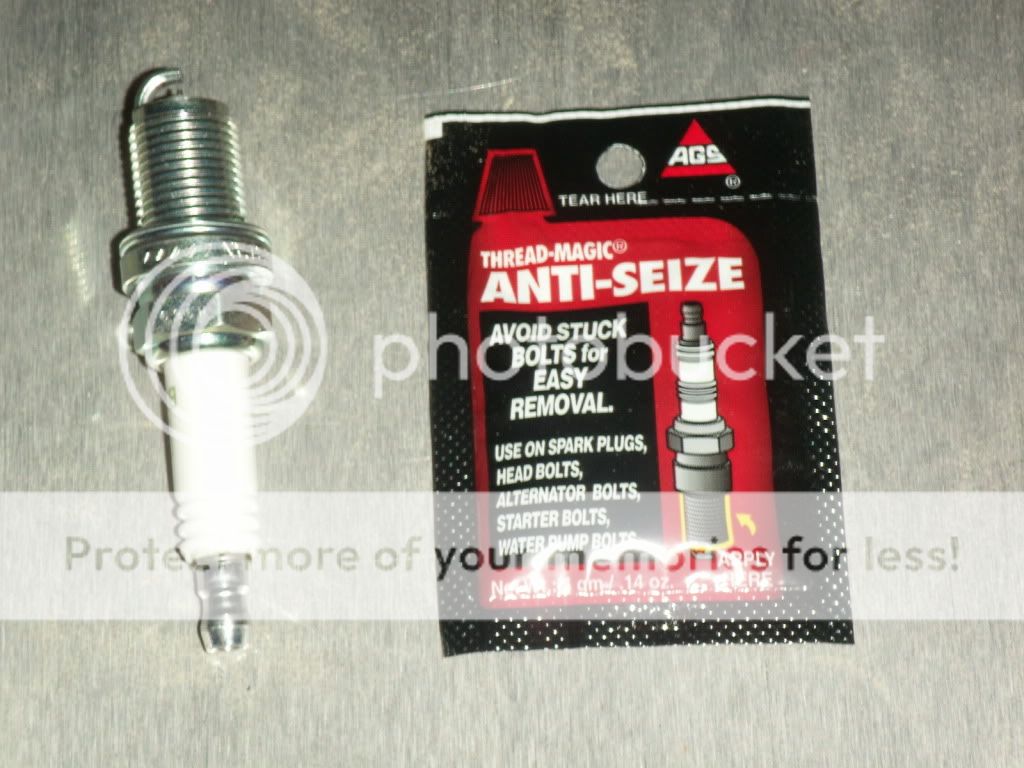
Materials:
-6 new Spark plugs (I used NGK platinum)
-3/8" Ratchet
-3" extension
-10" extension
-two 3/8" universal joints
-spark plug pliers
-torque wrench
-spark plug socket
-spark plug gap gauge (not shown)
-anti-seize compound
-flashlight or good lighting (not shown)
![Image]()
REMEMBER: FOR EACH PLUG YOU WILL:
A. Remove the rubber spark plug boot (some easy, some harder. See pics)
B. Clean the dirt/sand away from around the old plug (see TIP#1 below)
C. Remove plug (some plugs may have a different technique)
D. Clean area with plug removed (see TIP#1 below)
E. Gap new plug (0.039-0.043 inch) using spark plug gap gauge and apply anti-seize compound to plug threads (see pics for details)
F. Install new plug (torque to 14-22 ft-lbs)
G. Reattach rubber spark plug boot (boot will "grab" plug tip and seat firmly)
TIP#1: TO EFFECTIVELY CLEAN AREA AT PLUGS YOU WILL NEED:
-shopvac (or compressed air as an alternate)
-2 clean drinking straws
-duct tape
VACUUM ASSEMBLY: Insert one straw end into the end of the other straw to make a
long straw. Duct tape the connection. Next, take one end of the long straw and securely duct
tape it to the end of the shopvac hose ensuring a good seal. Turn on shop vac and test
suction.
USAGE: For steps B and D above, insert the straw tip into spark plug location and suck up any
dirt/sand. Be sure not to flick dirt/sand into cylinder. Repeat for each plug change as you go.
TIP#2: DUCT TAPE YOUR TOOLS: Duct tape your ratchet, sockets and extensions together at their connections before each plug attempt to ensure that your tools don't come apart when you are pulling the plug out. Trust me on this one.
TIP#3 (OPTIONAL): You might consider removing the hood of the truck to see #6 plug location easier. The hood is just 4 bolts and disconnecting the windshield washer fluid line. Again, this is optional. (Credit: knewman10783)
GETTING STARTED:
First, let's get familiar with the plug numbers. You can also see these numbers in raised numerals on your distributor cap:
![Image]()
Here are plugs 1, 3, and 5 located on the left side of the engine looking at the engine from the front of the vehicle:
![Image]()
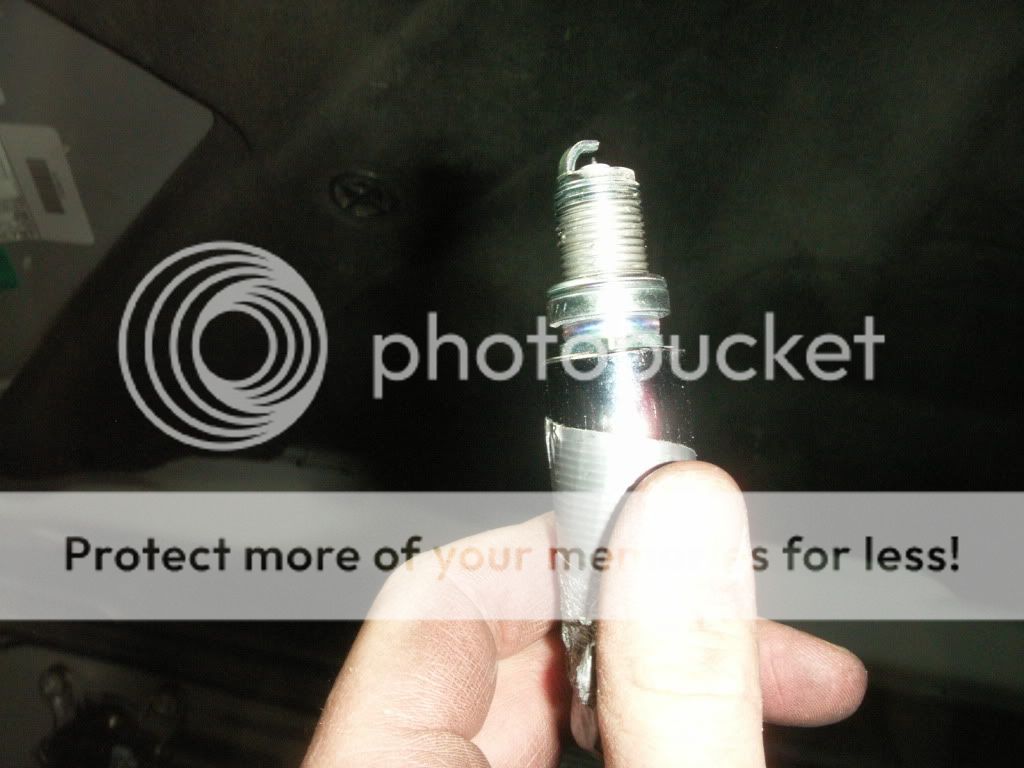
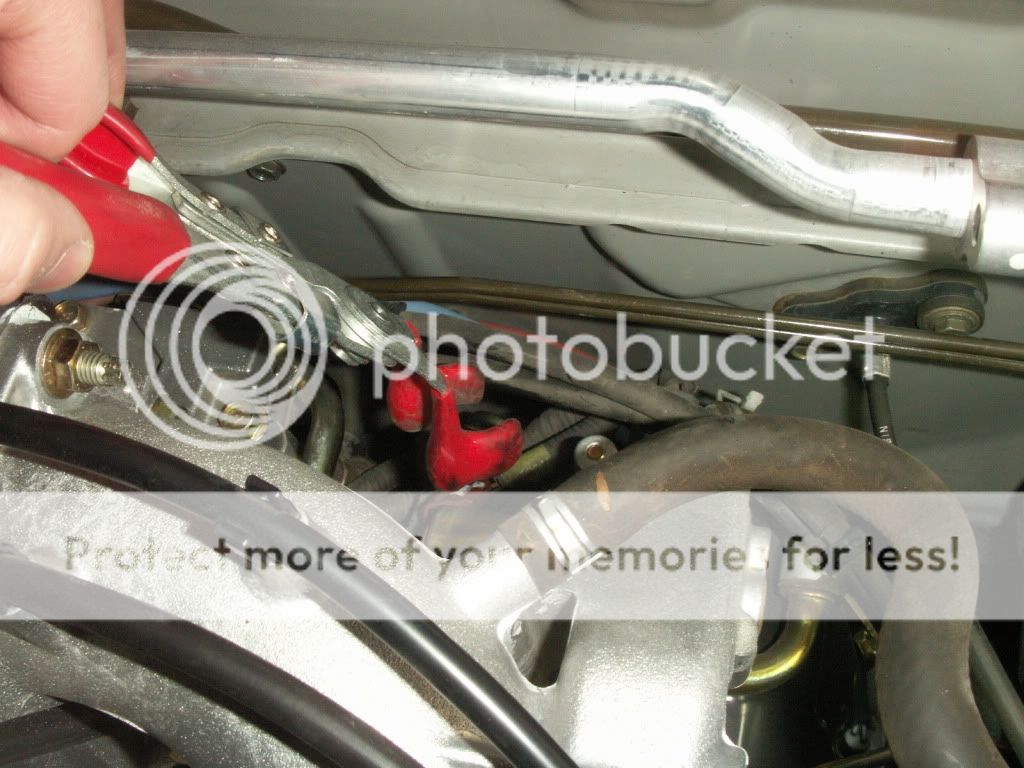
PLUG#1: Use spark plug pliers to remove the boot off the old plug. Grab the boot at the base of the boot and tug along the axis of the plug otherwise it will not disengage easily.
![Image]()
PLUG#1: Remove plug#1 using this ratchet combination:
spark plug socket,univ. joint,10"extension,ratchet
![Image]()
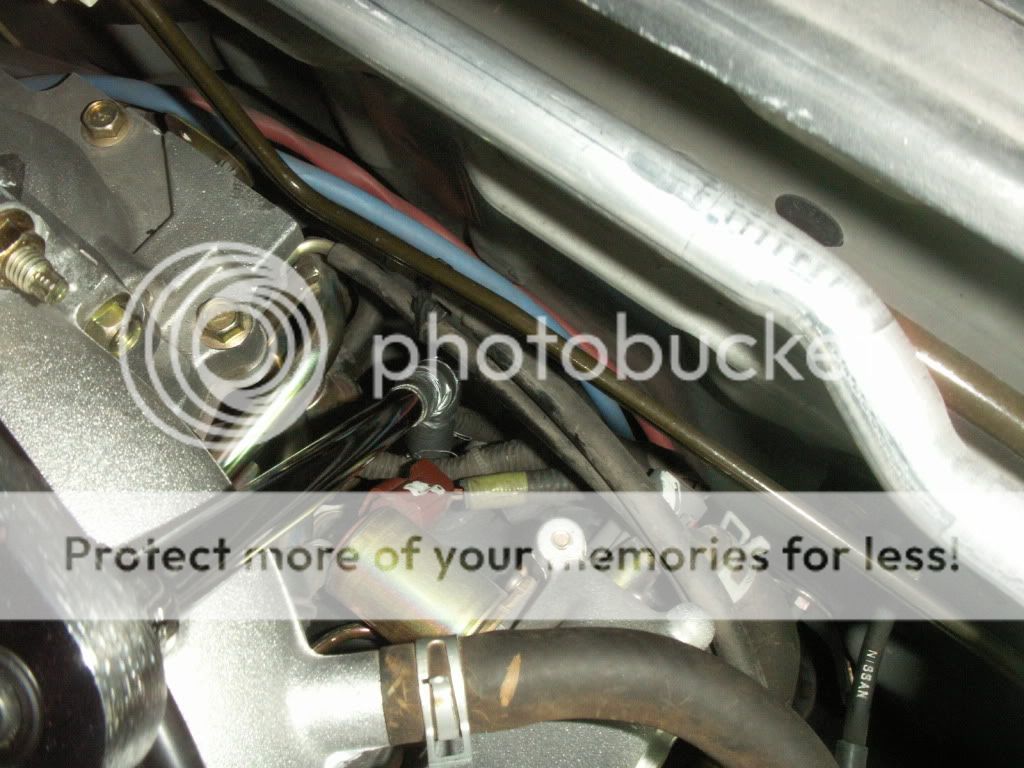
PLUG#1: Close-up. Old plug removed, with opening into cylinder shown:
![Image]()
PLUG#1: Prepare new plug. Gap to specs (between 0.039-0.043 inch). Apply anti-seize compound to most threads, leaving the few threads closest to the plug gap clean:
![Image]()
PLUG#1: Close-up of prepared spark plug. Note the anti seize compound is on all but the top few threads:
![Image]()
PLUG#1: Use same ratchet combo mentioned above to install new plug. Careful threading it. If plug does not turn smoothly past 1/4 to 1/2 turn, the plug is cross threaded. Back it out and try again. Torque to 14-22 ft-lbs.
![Image]()
PLUG#3: Close-up of plug #3's location:
![Image]()
PLUG#3: Remove boot using spark plug pliers:
![Image]()
PLUG#3: Use ratchet combo pictured to get the spark plug socket seated onto the old plug:
![Image]()
PLUG#3: Pictured here is the vacuum technique listed in TIP#1 above:
![Image]()
PLUG#3: Prepare the new plug like we did for plug #1. Thread the plug properly with ratchet combo and tighten it to 14-22 ft-lbs with torque wrench.
![Image]()
PLUG#5: Here is a close-up of plug 5's boot in the center of the pic.
![Image]()
PLUG#5. Angle of entry to plug #5:
![Image]()
PLUG#5: Another pic showing the ratchet combo engaging plug#5:
![Image]()
PLUG#3: Me and my copilot working on the X. Note the use of effective lighting:
![Image]()
PLUG#2: Use hands or spark plug pliers to remove boot for plug#2. Note the angle and location of plug#2 in pic:
![Image]()
PLUG#2: Here is a pic of plug #2 location with old plug removed and area cleaned:
![Image]()
PLUG#4 "THE BITCH": PLUG #4 is under the S/C intake tube that connects the supercharger to the throttle body. For this one, read my response taken from another thread at CX. It was impossible to get a camera shot of it.
PLUG#4: Here is a pic of your ratchet assembly for plug#4:
![Image]()
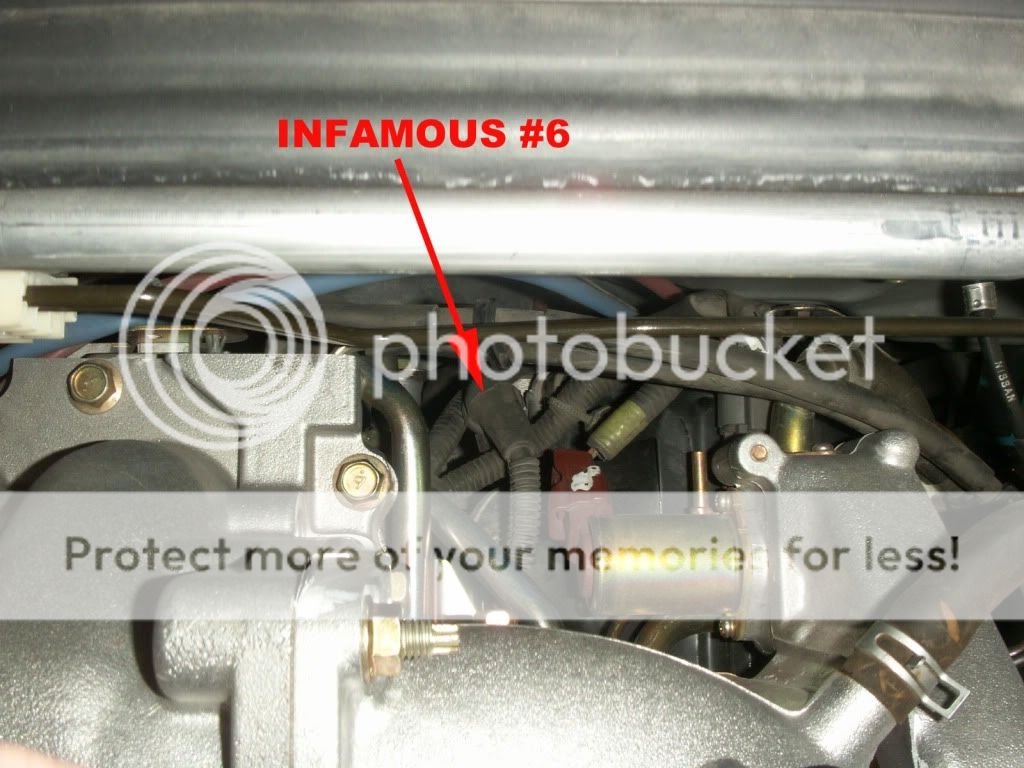
NOW THE INFAMOUS PLUG#6:
Right now you have probably broken out in a cold sweat and are probably thinking, "Oh dear Lord Jesus this can't be happening man, this can't be happening." Panic fills your heart as you consider paying a mechanic the precious money you were saving for that SL. don't do it! I didn't take these pics for you to wuss out on me now so compose yourself, and take a deep breath because it's not that bad. It's still a bitch but not that bad.
Here is a top-down pic of plug 6 taken from above the S/C. It is located on the firewall side of the engine block. Most of your work here will be done by feel. If you have a small mirror on a stick, now's the time to get it. Also get a blanket or cardboard and lay it across the top of the engine because you will have the urge to shove your face into the back attempting to get a look at it. NOTE: be careful when climbing on the engine. Your radiator is made out of plastic and aluminum. The nozzle connecting to the hose at your radiator cap will bust if you put weight on it. TRUST ME ON THIS ONE. If you don;t want to replace your radiator after this project, heed my warning. Be careful where you put your knees.
![Image]()
PLUG#6: Get your spark plug pliers. Again, the boot comes off when you are pulling away along the axis of the spark plug. For this one, you will be pulling up and slightly toward the firewall. It is also slightly angled to one side. Reach down and feel first to understand the angle. Then use the pliers to detach the boot from the plug:
![Image]()
PLUG#6: Plug removal. At this point, you, like me, are probably cursing the Nissan engineers who designed this engine setup. Continue to curse. Now look at this pic. Set up your ratchet like this:
spark plug socket, univ. joint, 3" extension, univ. joint, 10" extension.
NOTE: BE SURE TO DUCT TAPE ALL CONNECTIONS!!
Guide by feel the socket onto the plug. Use mirror if available although I had better luck feeling my way. When the socket is set on the plug twist slightly-if you feel resistance, your socket is likely on the plug's hex. good job. Loosen the plug slowly. Memorize the angle and exact direction it is backing up. Once you got it out keep the image of how it came off the engine block in your head and do the next step swiftly.
![Image]()
PLUG#6: Once the old plug is removed, clean the area with the vacuum straw tip like the rest. Prep your plug with anti-seize compound and be sure the gap on the plug is right (remember 0.039-0.043 inch). Insert the plug into your socket. Use all resources available to you (mirror, light, Jedi mind tricks) to feel your way with the wrench behind the engine to the #6 location. Feel your way around down there just like prom night. The plug will guide itself into the hole. The important part here is to remember and understand the angle of entry so you don't cross thread the plug. This is why I told you to memorize the way and angle it backed out. If it threads past 1/4 to 1/2 turn, you should be safe. Continue to tighten the plug and torque it to 14-22 ft-lbs. Replace the boot using the spark plug pliers.
Check:
1. All spark plug boots have been firmly and securely attached to their new plugs.
2. Remove all tools, blankets, lucky charms from engine compartment
3. Start your engine and listen for issues.
4. Congrats... you just graduated from infamous#6 school.
Thanks to Ian, Jordan for helping me on this project and thanks to all the CX members who inspired my confidence to pull it off.:anbeten-big:
Okay, so you want to change your spark plugs on your supercharged '02-'04 Xterra? Well I have composed a HOW-TO that I hope is worthy of your time. Read through it and study the pics before starting your project. The pics show alot of detail and were taken with the intent of writing this how-to and helping you at this moment. Good luck.
Materials:
-6 new Spark plugs (I used NGK platinum)
-3/8" Ratchet
-3" extension
-10" extension
-two 3/8" universal joints
-spark plug pliers
-torque wrench
-spark plug socket
-spark plug gap gauge (not shown)
-anti-seize compound
-flashlight or good lighting (not shown)

REMEMBER: FOR EACH PLUG YOU WILL:
A. Remove the rubber spark plug boot (some easy, some harder. See pics)
B. Clean the dirt/sand away from around the old plug (see TIP#1 below)
C. Remove plug (some plugs may have a different technique)
D. Clean area with plug removed (see TIP#1 below)
E. Gap new plug (0.039-0.043 inch) using spark plug gap gauge and apply anti-seize compound to plug threads (see pics for details)
F. Install new plug (torque to 14-22 ft-lbs)
G. Reattach rubber spark plug boot (boot will "grab" plug tip and seat firmly)
TIP#1: TO EFFECTIVELY CLEAN AREA AT PLUGS YOU WILL NEED:
-shopvac (or compressed air as an alternate)
-2 clean drinking straws
-duct tape
VACUUM ASSEMBLY: Insert one straw end into the end of the other straw to make a
long straw. Duct tape the connection. Next, take one end of the long straw and securely duct
tape it to the end of the shopvac hose ensuring a good seal. Turn on shop vac and test
suction.
USAGE: For steps B and D above, insert the straw tip into spark plug location and suck up any
dirt/sand. Be sure not to flick dirt/sand into cylinder. Repeat for each plug change as you go.
TIP#2: DUCT TAPE YOUR TOOLS: Duct tape your ratchet, sockets and extensions together at their connections before each plug attempt to ensure that your tools don't come apart when you are pulling the plug out. Trust me on this one.
TIP#3 (OPTIONAL): You might consider removing the hood of the truck to see #6 plug location easier. The hood is just 4 bolts and disconnecting the windshield washer fluid line. Again, this is optional. (Credit: knewman10783)
GETTING STARTED:
First, let's get familiar with the plug numbers. You can also see these numbers in raised numerals on your distributor cap:

Here are plugs 1, 3, and 5 located on the left side of the engine looking at the engine from the front of the vehicle:

PLUG#1: Use spark plug pliers to remove the boot off the old plug. Grab the boot at the base of the boot and tug along the axis of the plug otherwise it will not disengage easily.

PLUG#1: Remove plug#1 using this ratchet combination:
spark plug socket,univ. joint,10"extension,ratchet

PLUG#1: Close-up. Old plug removed, with opening into cylinder shown:

PLUG#1: Prepare new plug. Gap to specs (between 0.039-0.043 inch). Apply anti-seize compound to most threads, leaving the few threads closest to the plug gap clean:
PLUG#1: Close-up of prepared spark plug. Note the anti seize compound is on all but the top few threads:
PLUG#1: Use same ratchet combo mentioned above to install new plug. Careful threading it. If plug does not turn smoothly past 1/4 to 1/2 turn, the plug is cross threaded. Back it out and try again. Torque to 14-22 ft-lbs.

PLUG#3: Close-up of plug #3's location:

PLUG#3: Remove boot using spark plug pliers:

PLUG#3: Use ratchet combo pictured to get the spark plug socket seated onto the old plug:

PLUG#3: Pictured here is the vacuum technique listed in TIP#1 above:

PLUG#3: Prepare the new plug like we did for plug #1. Thread the plug properly with ratchet combo and tighten it to 14-22 ft-lbs with torque wrench.

PLUG#5: Here is a close-up of plug 5's boot in the center of the pic.

PLUG#5. Angle of entry to plug #5:

PLUG#5: Another pic showing the ratchet combo engaging plug#5:

PLUG#3: Me and my copilot working on the X. Note the use of effective lighting:

PLUG#2: Use hands or spark plug pliers to remove boot for plug#2. Note the angle and location of plug#2 in pic:

PLUG#2: Here is a pic of plug #2 location with old plug removed and area cleaned:
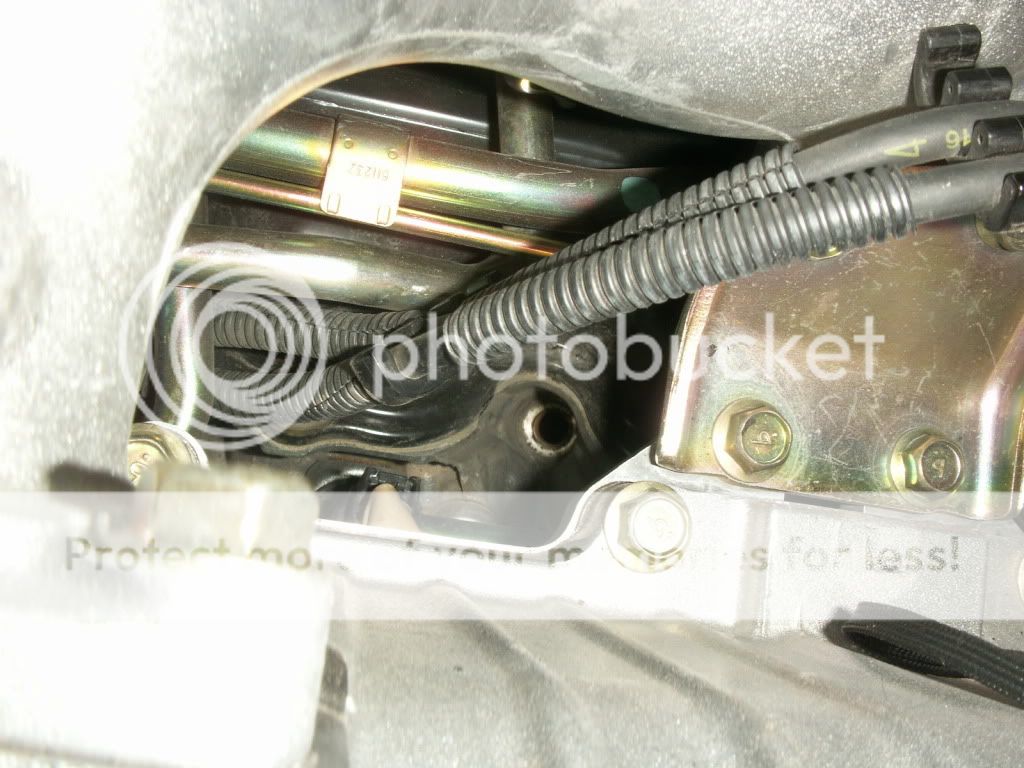
PLUG#4 "THE BITCH": PLUG #4 is under the S/C intake tube that connects the supercharger to the throttle body. For this one, read my response taken from another thread at CX. It was impossible to get a camera shot of it.
PLUG#4: Here is a pic of your ratchet assembly for plug#4:

NOW THE INFAMOUS PLUG#6:
Right now you have probably broken out in a cold sweat and are probably thinking, "Oh dear Lord Jesus this can't be happening man, this can't be happening." Panic fills your heart as you consider paying a mechanic the precious money you were saving for that SL. don't do it! I didn't take these pics for you to wuss out on me now so compose yourself, and take a deep breath because it's not that bad. It's still a bitch but not that bad.
Here is a top-down pic of plug 6 taken from above the S/C. It is located on the firewall side of the engine block. Most of your work here will be done by feel. If you have a small mirror on a stick, now's the time to get it. Also get a blanket or cardboard and lay it across the top of the engine because you will have the urge to shove your face into the back attempting to get a look at it. NOTE: be careful when climbing on the engine. Your radiator is made out of plastic and aluminum. The nozzle connecting to the hose at your radiator cap will bust if you put weight on it. TRUST ME ON THIS ONE. If you don;t want to replace your radiator after this project, heed my warning. Be careful where you put your knees.
PLUG#6: Get your spark plug pliers. Again, the boot comes off when you are pulling away along the axis of the spark plug. For this one, you will be pulling up and slightly toward the firewall. It is also slightly angled to one side. Reach down and feel first to understand the angle. Then use the pliers to detach the boot from the plug:
PLUG#6: Plug removal. At this point, you, like me, are probably cursing the Nissan engineers who designed this engine setup. Continue to curse. Now look at this pic. Set up your ratchet like this:
spark plug socket, univ. joint, 3" extension, univ. joint, 10" extension.
NOTE: BE SURE TO DUCT TAPE ALL CONNECTIONS!!
Guide by feel the socket onto the plug. Use mirror if available although I had better luck feeling my way. When the socket is set on the plug twist slightly-if you feel resistance, your socket is likely on the plug's hex. good job. Loosen the plug slowly. Memorize the angle and exact direction it is backing up. Once you got it out keep the image of how it came off the engine block in your head and do the next step swiftly.
PLUG#6: Once the old plug is removed, clean the area with the vacuum straw tip like the rest. Prep your plug with anti-seize compound and be sure the gap on the plug is right (remember 0.039-0.043 inch). Insert the plug into your socket. Use all resources available to you (mirror, light, Jedi mind tricks) to feel your way with the wrench behind the engine to the #6 location. Feel your way around down there just like prom night. The plug will guide itself into the hole. The important part here is to remember and understand the angle of entry so you don't cross thread the plug. This is why I told you to memorize the way and angle it backed out. If it threads past 1/4 to 1/2 turn, you should be safe. Continue to tighten the plug and torque it to 14-22 ft-lbs. Replace the boot using the spark plug pliers.
Check:
1. All spark plug boots have been firmly and securely attached to their new plugs.
2. Remove all tools, blankets, lucky charms from engine compartment
3. Start your engine and listen for issues.
4. Congrats... you just graduated from infamous#6 school.
Thanks to Ian, Jordan for helping me on this project and thanks to all the CX members who inspired my confidence to pull it off.:anbeten-big:
")